ADT282
Additel 282 Dual Channel Reference Thermometer Readout
Price on request
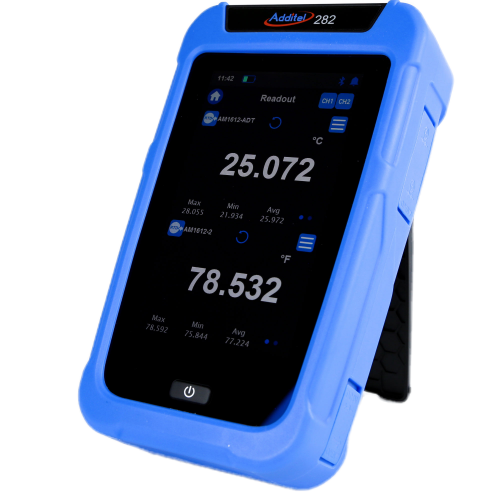
Additel’s 282 Reference Thermometer Readout delivers the best possible accuracies and features in the palm of your hand!
- Product description
- Extra information
- Video
- Downloads
-
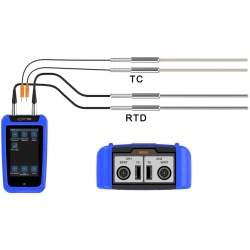
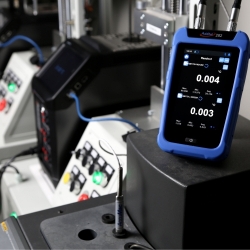
Additel’s 282 Reference Thermometer Readout delivers the best possible accuracies and features in the palm of your hand! With accuracy capabilities on par with laboratory grade thermometers, the ADT282 is capable of handling even your most critical measurements. This ultra-high precision readout features dual analog channels designed to facilitate comparison measurements and meet all of your temperature measurement needs. The easy to use touchscreen makes navigating the well-designed menus a time saving and enjoyable experience. The Lemo style smart connectors help to ensure that your probe calibration information is never in question. The ADT282 Reference Thermometer Readout helps makes metrology simple and will quickly become your new go-to when reliable temperature measurements are a must.
-
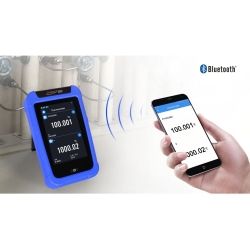
Technical Specifications Display5.0 inch 480 x 800 TFT LCD capacitive screen Size16.97" x 4.13" x 2.04" (177 mm x 105 mm x 52 mm)Weight1.5 lbs. (0.65 Kg)Power Supply6600mAh, 23.8Wh lithium battery, charging time 4~6 hours, battery pack can be charged independent. Battery life typically 16 hours EnvironmentSpecification guaranteed temperature range: (10~30) °C Working Temperature: (-10~50) °CStorage temperature: (-20~70) °CHumidity: 0% ~ 95% RH, non-condensingWarm-Up Time10 minutesPorts Protection Voltage50V maxCE CertificateTUV IEC61326,IEC61010Rohs ComplianceRohs II Directive 2011/65/EU,EN50581:2012IP Protection LevelIP67, 1 meter drop testCommunicationIsolate USB-TYPEC (slave), Bluetooth BLEInput ChannelsCH1, CH2 analog channel, 6 pins smart lemo ports for RTD probe;MINI-TC ports for TC probeMeasurement DisplaySingle channel, dual channel, differential (e.g T1-T2)Measuring RatesCH1, CH2 analog channels alternately and cyclically measure RTD measuring rate: 1.6S/single channel, 1.6S/dual channel TC measuring rate: 0.8S/single channel, 0.8S/dual channelMeasurement Units°C, °F, KStatisticsMax, Min, AvgMeasurement Specifications PRT Measurement RTD Types ITS-90, CVD, Ohms, Pt100 (385), Pt10 (385), Pt25 (385), Pt50 (385), Pt100 (3916), Pt100 (3926), Pt100 (391), Cu100 (428), Cu50 (428), Cu10 (427), Ni100 (617), Ni100 (618), Ni120 (672), and custom RTD Resistance Accuracy 0~400Ω: ±0.5mΩ@(0~20Ω),±25ppm@(20~400Ω) Measurement range -200°C ~ 850°C Resolution ±0.1mΩ or 0.001°C Connection Type 4-wire smart connection Excitation Current 1 mA - alternating constant current Temperature Coefficient ±2ppm FS/°C (-10°C~10°C and 30°C~50°C) TC Measurement TC Types mV, S, R, B, K, N, E, J, T, C, D, G, L, U, LR, A, 10uV/°C, 1mV/°C, Standard TC Electrical Measurement -10~75mV: 50ppm RDG+2uV TC measurement range -270°C ~ 1800°C Resolution ±0.1uV or 0.001°C Connection Type Mini-TC CJC compensation methods Internal, external or manual entry Temperature Coefficient ±5ppm FS/°C (-10°C~10°C and 30°C~50°C) Accuracy (°C)
Temperature
ADT282 Readout Only in TemperatureADT282 Readout with Selected Probes* AM1760AM1751 AM1730-200 0.005 0.0130.017 0.0170 0.006 0.0090.011 0.011100 0.009 0.0140.016 0.016232 0.013 0.0190.021 0.021420 0.018 0.0270.029 0.029660 0.026 0.0400.043 N/A*Includes readout accuracy, probe calibration, and probe drift.(K=2) Thermocouple Measurement (Environment Temperature: 20±10oC) TypeTemperature Range (oC) Accuracy (oC)
External CJC compensation (1 year)Accuracy (oC)Internal CJC compensation(1 year)S
-50 to 1768-50~00.510.530~1000.370.40100~17680.280.32R
-50 to 1768-50~00.540.560~2000.380.41200~17680.250.29B
0 to 1820200~3001.011.02300~5000.660.68500~8000.410.44800~18200.280.32K
-270 to 1372-250 to -2000.480.50-200 to -1000.150.21-100 to 6000.080.17600 to 13720.140.21N
-270 to 1300-250 to -2000.760.77-200 to -1000.220.27-100 to 13000.120.19E
-270 to 1000-250~-2000.260.30-200~-1000.100.18-100~700 0.060.16700~10000.080.17J
-210~1200-210~-1000.130.20-100~700 0.060.16700~12000.100.18T
-270 to 400-250~-1000.360.39-100~00.080.170~4000.050.16C
0 to 23150 to 1000 0.160.221000 to 18000.260.301800 to 23150.420.45D0~23150~1000.21 0.26100~12000.16 0.221200~20000.27 0.312000~23150.42 0.45
G
0 to 231550~1000.60 0.62100~2000.38 0.41200~4000.24 0.28400~15000.16 0.221500~23150.32 0.35
L
-200 to 900-200 to -1000.07 0.17-100 to 4000.06 0.16400 to 9000.07 0.17U -200 to 600 -200 to 00.14 0.210 to 6000.05 0.16LR -200~800 -200~00.09 0.170~8000.06 0.16
A0~25000~12000.20 0.251200~20000.33 0.362000~25000.48 0.50Secondary PRT Information Specification AM1710 Series AM1730 Series AM1751 Series AM1760 Series Temperature Range [3] -60°C to 160°C -200°C to 420°C -200°C to 670°C -200°C to 670°C Resistance at 0°C Nominal 100Ω Temperature Coefficient 0.003925 Ω / Ω / °C Calibrated Accuracy (k=2)[2][3] ±0.025°C at -40°C ±0.025°C at -40°C ±0.025°C at -40°C ±0.010°C at -196°C ±0.015°C at 0.01°C ±0.015°C at 0.01°C ±0.015°C at 0.01°C ±0.006°C at 0.01°C ±0.025°C at 160°C ±0.035°C at 420°C ±0.035°C at 420°C ±0.015°C at 420°C ±0.05°C at 661°C ±0.025°C at 661°C Drift ±0.01°C at TPW after 100 hours at 160°C ±0.01°C at TPW after 100 hours at 420°C ±0.01°C at TPW after 100 hours at 661°C ±0.004°C at TPW after 100 hours at 661°C Short Term Stability ±0.007°C ±0.002°C Thermal Shock ±0.005°C after (10) thermal cycles from minimum to maximum temperatures ±0.002°C after (10) thermal cycles from minimum to maximum temperatures Hysteresis <=0.005°C <=0.001°C Self-heating 50 mW/°C 0.0015°C at 0.5mA Response Time 9 seconds for 63% response to step change in water moving at 3 feet per second Measurement Current 0.5 mA or 1 mA Sensor Length 32 mm 42 mm Sensor Location 5 mm from tip Insulation Resistance >1000 MΩ at room temperature Sheath Material Stainless Steel Inconeltm Dimension AM1710-12-ADT AM1730-12-ADT AM1751-12-ADT AM1760-12-ADT 0.25 in dia X 12 in (6.35 mm X 305 mm) 0.25 in dia X 12 in (6.35 mm X 305 mm) 0.25 in dia X 12 in (6.35 mm X 305 mm) 0.25 in dia X 12 in (6.35 mm X 305 mm) AM1710-BEND-ADT AM1730-BEND-ADT AM1751-BEND-ADT AM1760-BEND-ADT 0.25 in dia X 12 in (6.35 mm X 305 mm), 90° bend at 7.4 inch (190 mm) from probe end 0.25 in dia X 12 in (6.35 mm X 305 mm), 90° bend at 9.6 inch (245 mm) from probe end 0.25 in dia X 12 in (6.35 mm X 305 mm), 90° bend at 9.6 inch (245 mm) from probe end 0.25 in dia X 12 in (6.35 mm X 305 mm), 90° bend at 9.6 inch (245 mm) from probe end External Leads Teflontm –insulated copper wire, 4 leads, 0.8 meters Handle Dimension 15 mm (OD) x 65 mm (L) Handle Temperature Range[1] -50°C to 160°C -50°C to 180°C Calibration NIST traceable calibration with data included. Accredited calibration available per request. [1] Handle temperatures outside this range will cause damage to the probe. [2] Includes calibration and 100 hour drift. [3] Probe calibration ranges may differ from probe temperature ranges (see Calibrated Accuracy for calibration ranges). *PRT Information from www.accumac.com -
Documents:
File name Upload Date Size Additel 282 Multifunction Process Calibrator Datasheet 2021.6.30 1.3 MB Additel 282 Documenting Process Calibrator User Manual 2019.3.11 0.8 MB
Update Packages:File name Upload Date Size Additel 227 Firmware Update Package 2021.11.11 23 MB


